Protocontroller V1.1
Protocontroller V1.1
Section titled “Protocontroller V1.1”Pinout
Section titled “Pinout”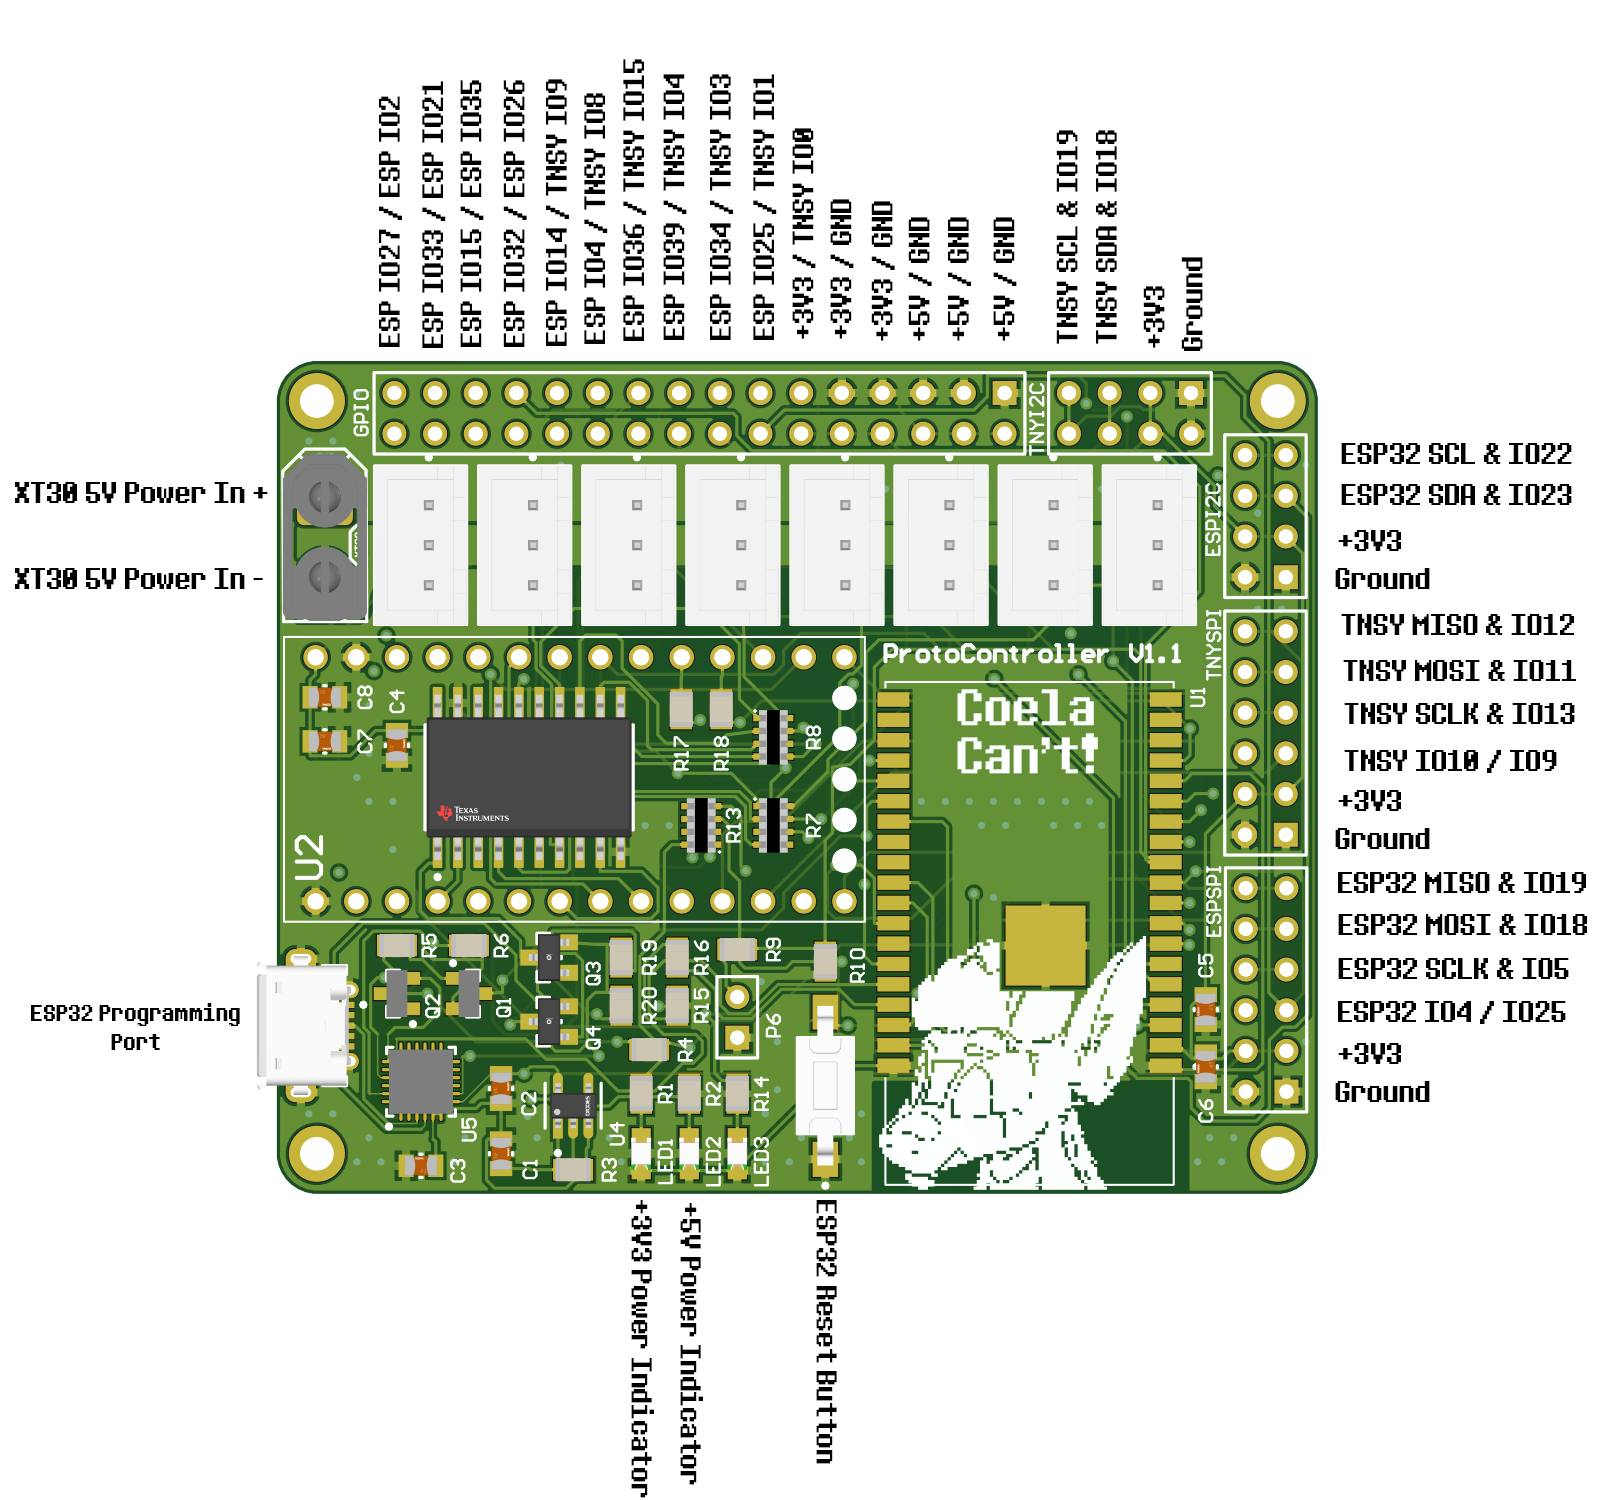
Schematic
Section titled “Schematic”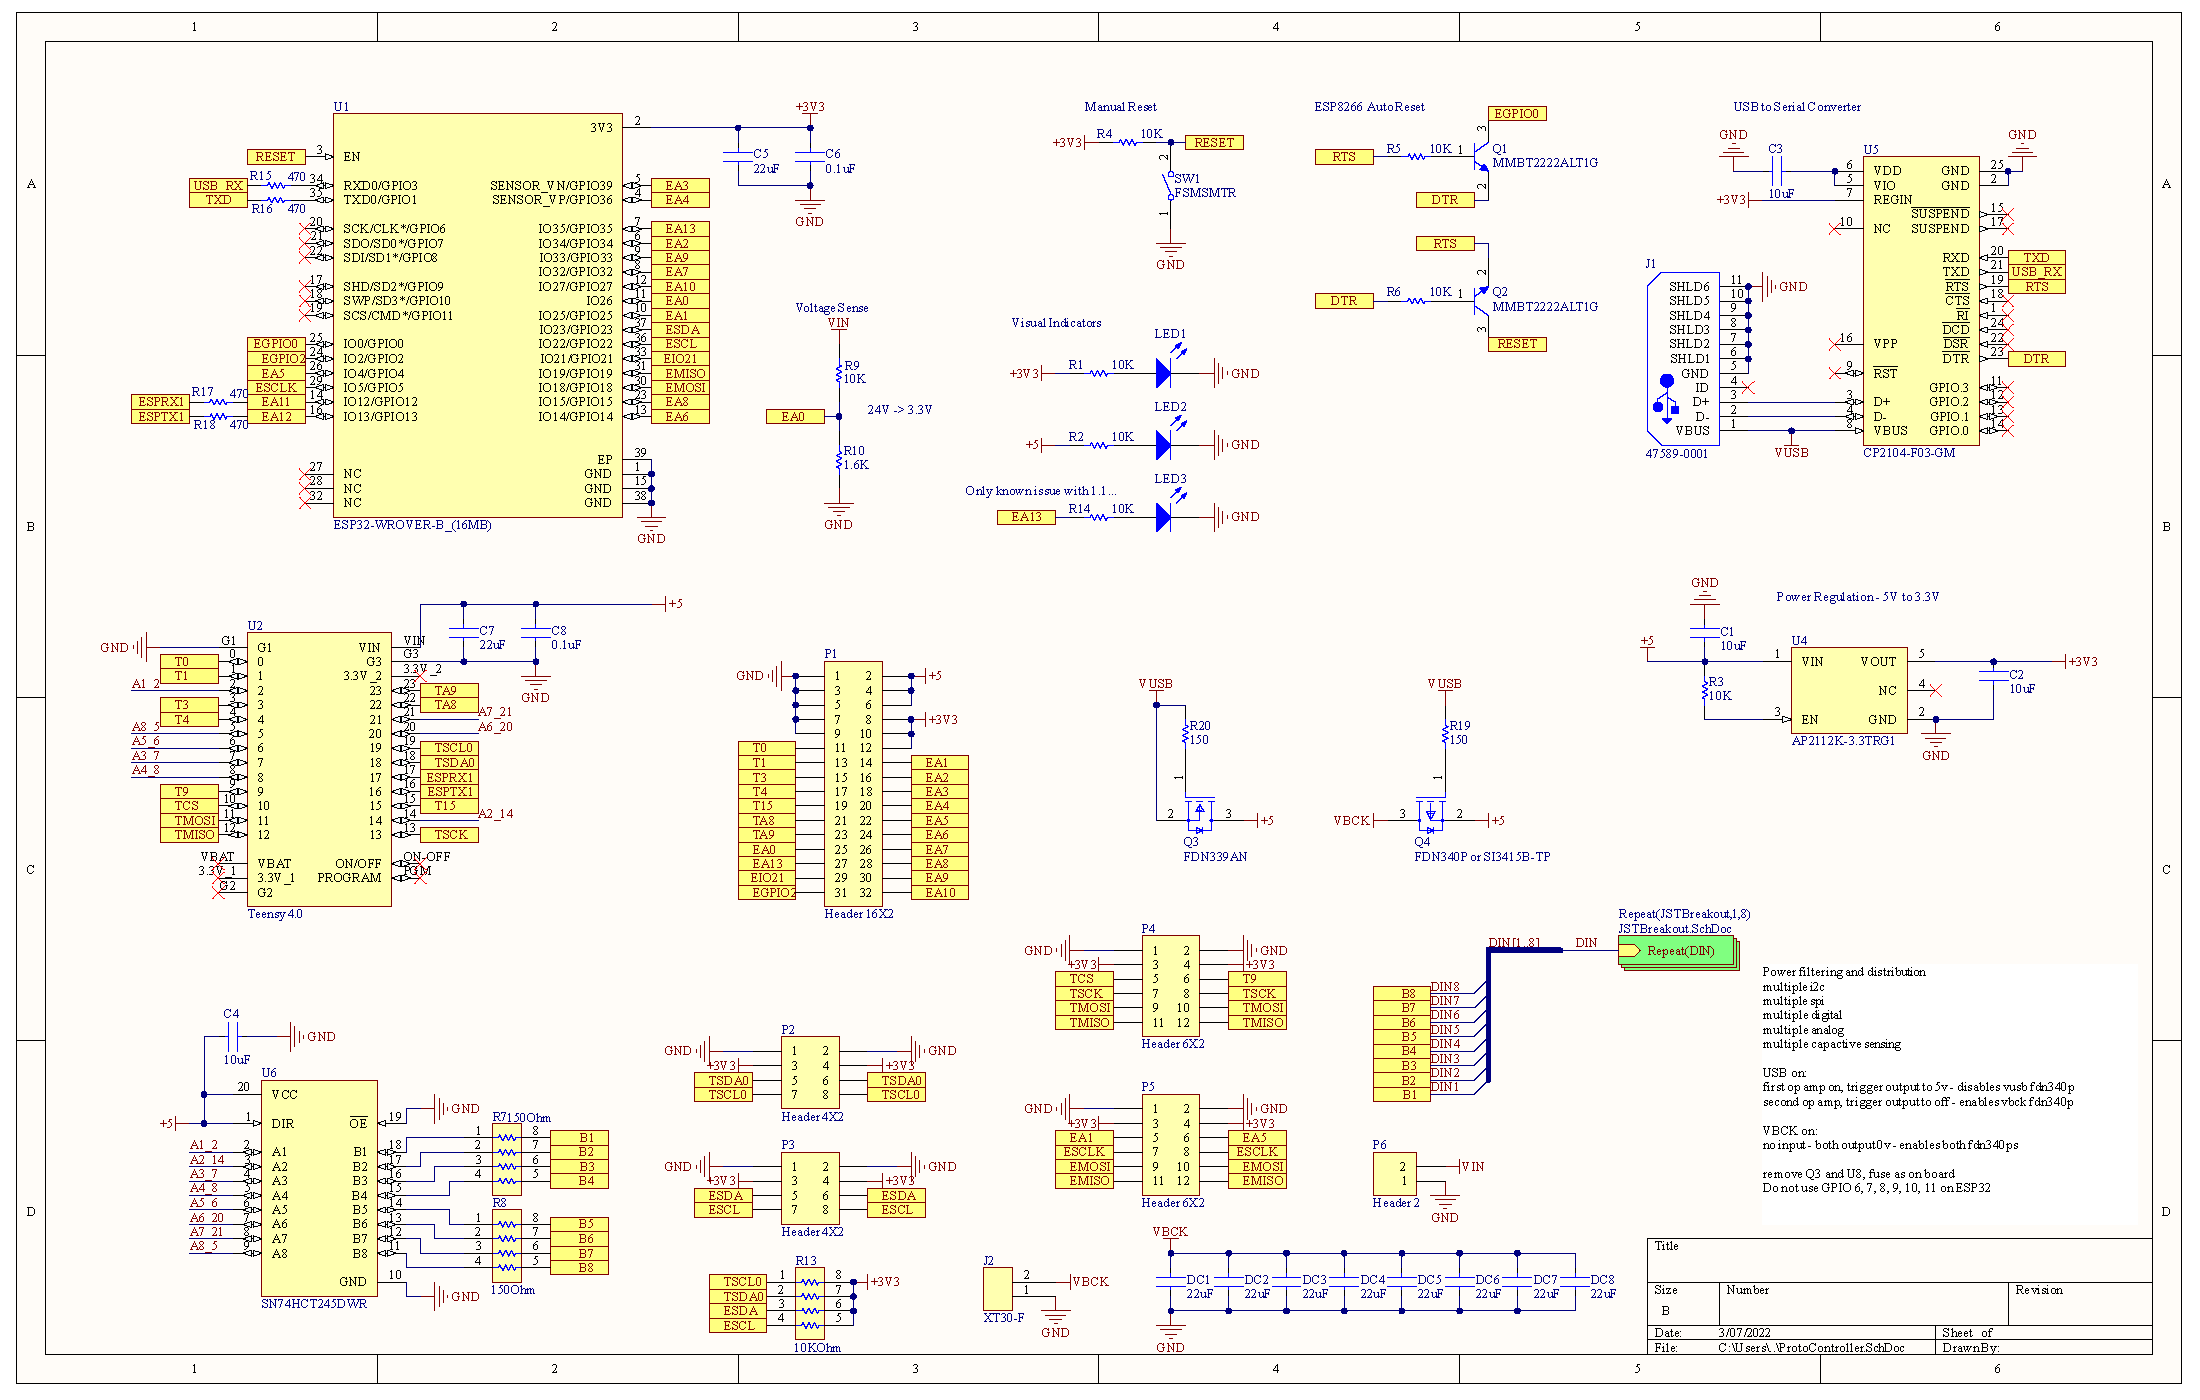
Physical Design
Section titled “Physical Design”Top View
Section titled “Top View”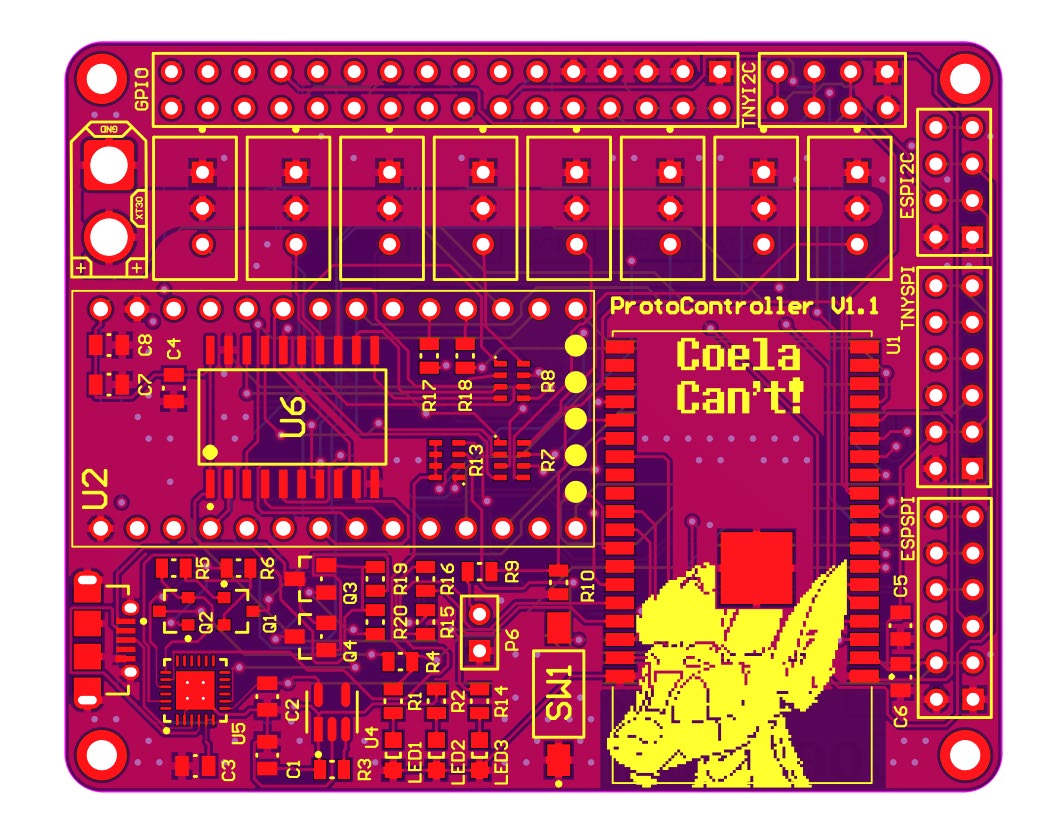
Bottom View
Section titled “Bottom View”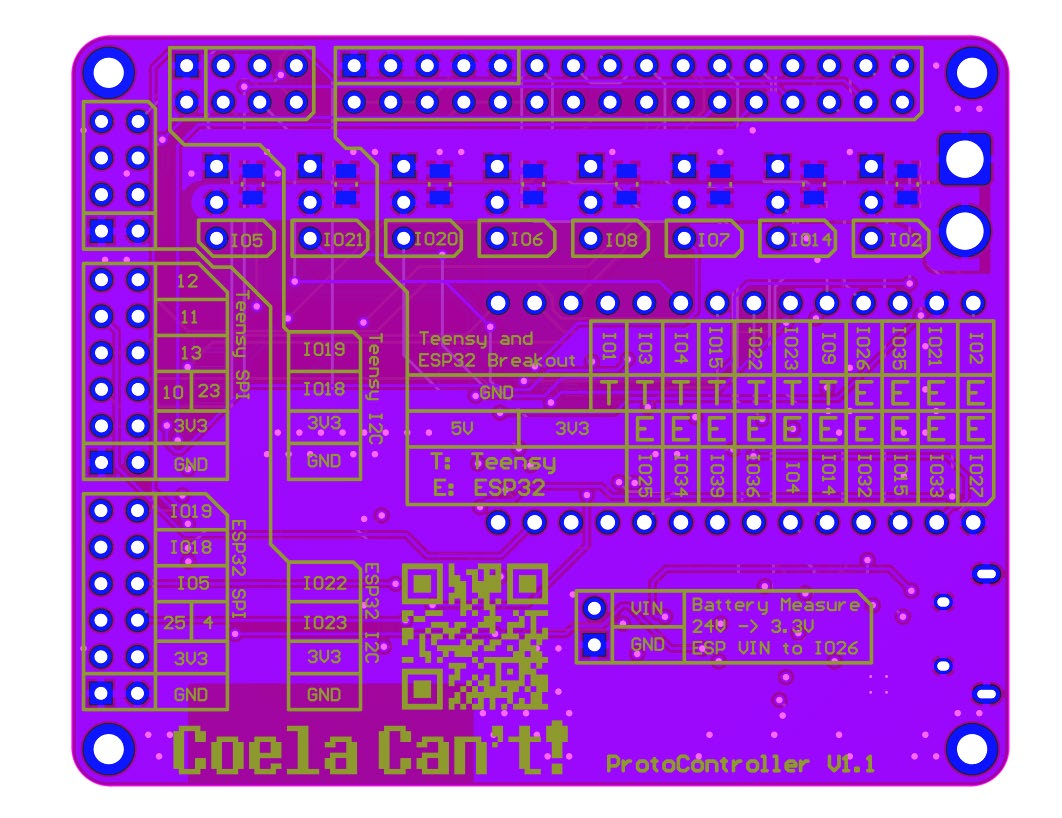
Isolated Top Layer View
Section titled “Isolated Top Layer View”
Isolated Signal Layer 1 View
Section titled “Isolated Signal Layer 1 View”
Isolated Signal Layer 2 View
Section titled “Isolated Signal Layer 2 View”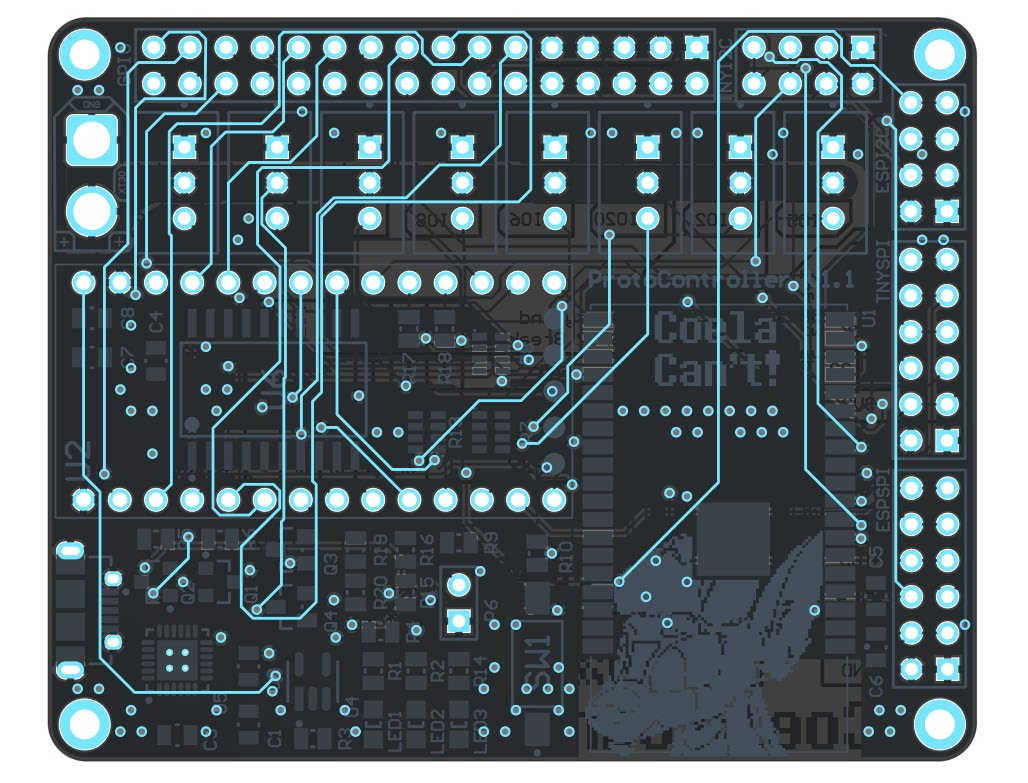
Isolated Bottom Layer View
Section titled “Isolated Bottom Layer View”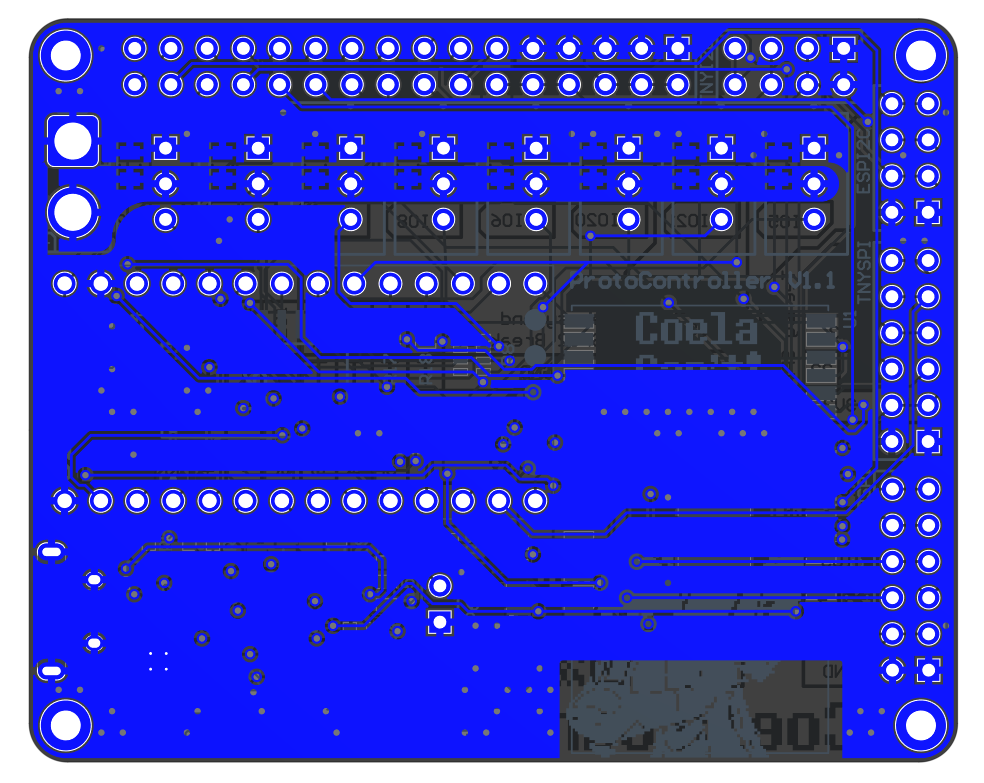
Isolated Top Layer Overlay
Section titled “Isolated Top Layer Overlay”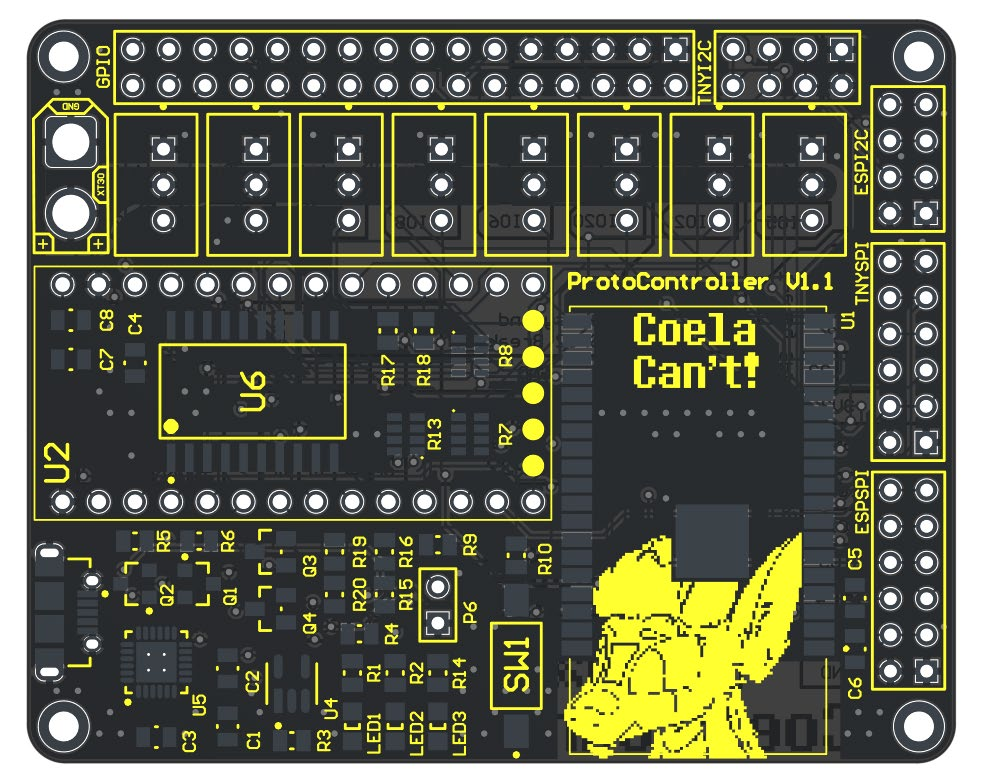
Isolated Bottom Layer Overlay (Flipped)
Section titled “Isolated Bottom Layer Overlay (Flipped)”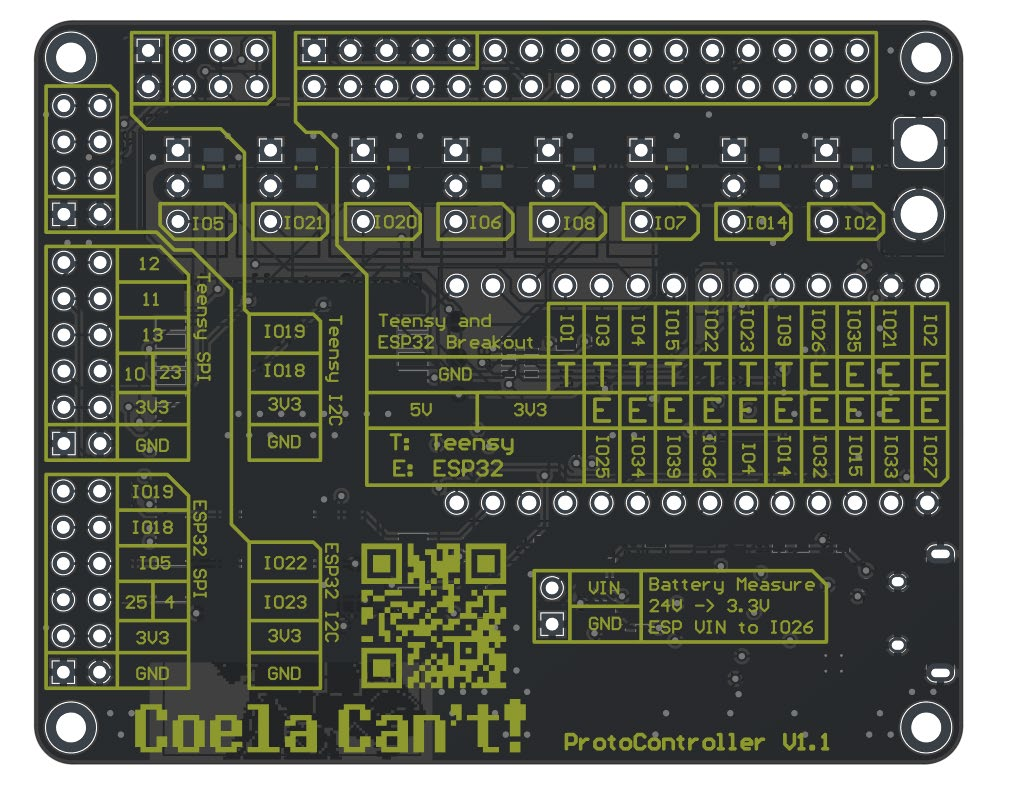
Power Setup
Section titled “Power Setup”The full controller can be powered 3 different ways, two of which should be done, one should be prevented.
Powering the ESP32 for Programming
Section titled “Powering the ESP32 for Programming”The ESP32 can be connected directly with the onboard USB Micro port, no changes need to be made to use it. It can be plugged in and programmed as-is.
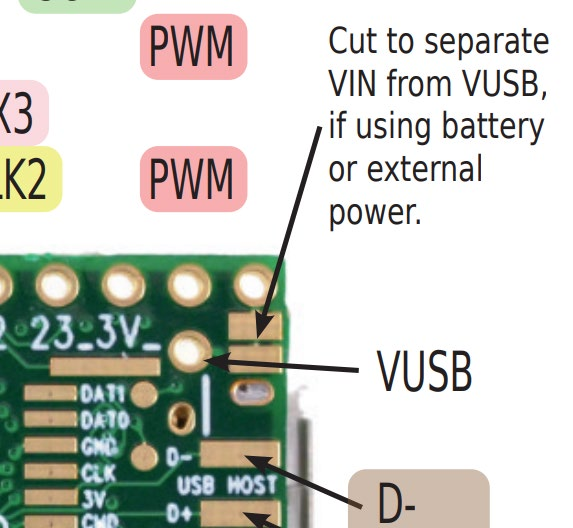
Powering the Teensy 4.0 for Programming
Section titled “Powering the Teensy 4.0 for Programming”For programming the Teensy 4.0, the bottom VIN from VUSB trace needs to be cut as to not provide power to the LED boards and cause damage while programming.
Powering the Controller for Usage
Section titled “Powering the Controller for Usage”To use the controller, 5V must be provided to the XT30 connector. Make sure you follow the standards for the XT30 polarity!